Higher Logic Vanilla (Vanilla) allows administrators to customize Vanilla's built-in email templates and create their own custom templates. This enables community teams to design, manage, and automate branded emails directly from within Vanilla without the need for custom services.
Typical use‑cases include:
- onboarding/welcome messages,
- inactivity re‑engagement campaigns,
- profile update reminders,
- and community updates.
Feature overview
- Email personalization: Personalization tokens (e.g., “Hey
{user.name}!”) can be inserted in the Subject Line, Body, Headline, and CTA fields, which will automatically be personalized to the recipient upon receipt. - Branding & style overrides: Default styles are pre-populated from your Email Settings, with per-template overrides for email logo, text color, background color, page color, and button color.
- Preview & send test email: You can preview your templates and send test emails to ensure proper rendering across email clients.
- Text translation: You can add localized Subject, Body, and Footer text in each of your community's enabled languages; the system sends the translated version when the user has a preferred language, while otherwise resorting to your community's default language.
- Usage visibility & safeguards: The Email Templates page lists your templates and indicates how many Automation Rules each template is tied to; deletion is disabled when a template is in use.
- Email preferences & unsubscribe: Users can unsubscribe via in-email links and manage their preferences via their profiles.
Getting started
- If Automation Rules are not enabled in your community, you're limited to customizing Vanilla's built-in email templates only.
- If Automation Rules are enabled in your community, you can also create custom email templates. This is because you must associate custom templates to an Automation Rule for it to send (you cannot send these emails manually).
Access your email templates
- Access the Dashboard.
- Navigate to Settings > Communications > Email Templates.
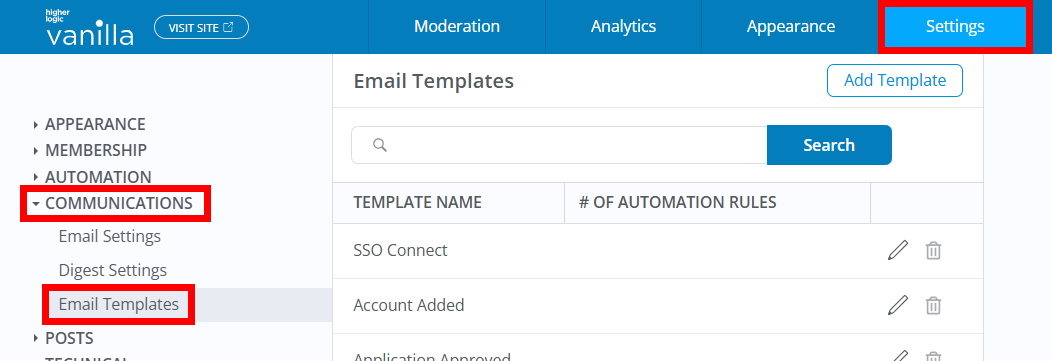
The Email Templates page lists all of Vanilla's built-in system templates and any custom templates your organization has created. The associated Automation Rule(s) for each custom template is clearly noted.
Available built-in templates
The following templates are built-in and are automatically sent in your community, but you're free to update them to meet your needs.
- Welcome: Sent on user registration (shown only when Basic registration is enabled).
- Membership Approved: Sent when a join request is approved (available only when Approval registration is enabled).
- Invitation: Sent when inviting users (available only when Invitation registration is enabled).
- SSO Connect: Sent the first time a user connects via SSO (always available because you can have SSO and another registration method enabled at the same time).
NOTE: This message can be disabled. Contact Vanilla Support for assistance.
- Account Added: Sent when an admin creates a user account (always available).
IMPORTANT: The default content of the 'Account Added' template's message is not applicable if your account uses SSO for log ins. However, this auto-send message cannot be disabled.
To avoid confusion among your community users, Higher Logic recommends that you: i) remove any references to account credentials (e.g., username and password) to prevent implying that separate login details are required and, ii) modify the template to clarify that users should log in using your organization's SSO. For example, change the subject to "Access Your Account with [Your Organization's] SSO" and include instructions in the message about using SSO for authentication.
Create a custom email template
- Navigate to the Email Templates page (as outlined above).
- Click Add Template.
- On the resulting page, you'll create your template by filling out fields and options grouped into several sections. Each section and its associated options are described below.

TIP: Don't forget you can insert personalization tokens into your subject lines, body, headline, and CTA fields to automatically personalize them to each recipient. Refer to the Personalization tokens section below to learn more.
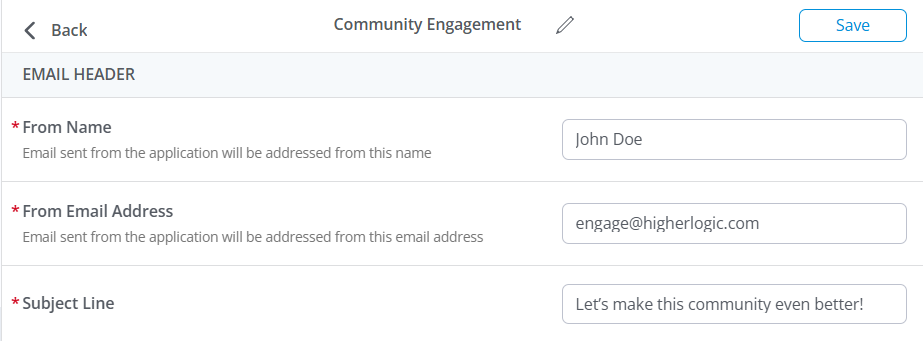
Email Header
- From Name: Sender display name shown to recipients.
- From Email Address: Sender email address used for replies/deliverability.
- Subject Line: The subject line for all emails sent with this template.
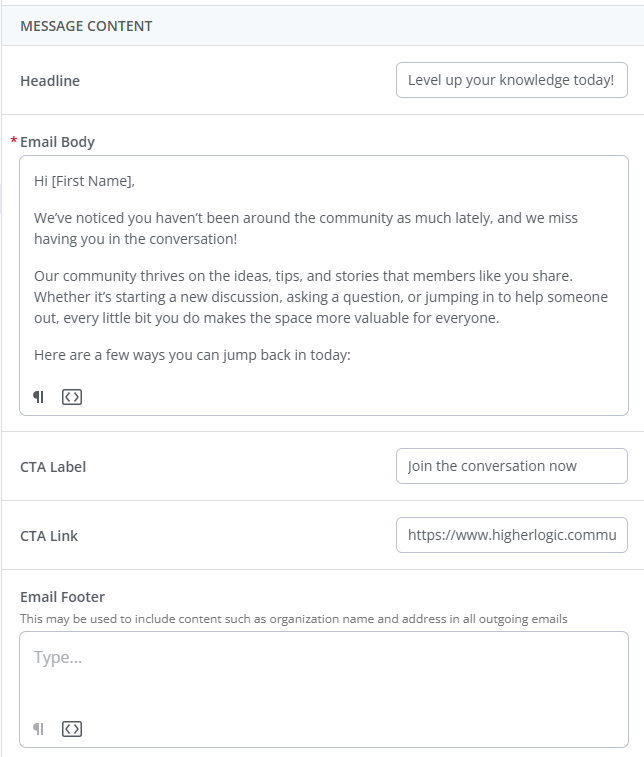
Message Content
- Headline: This is an optional content title that displays prominently at the top of the email message, separate from the Subject Line and the main Body text. It's often added to improve clarity and consistency for onboarding/notification type messages.
- Email Body: The main message content, authored in the Rich Editor.
- CTA Label/Link: Optionally define a call‑to‑action button/text and target URL. Fill out these fields when you want recipients to complete specific calls to action, such as registering for an upcoming event, updating their profile information, etc.
- Email Footer: Optionally insert additional content that appears below the body.
NOTE: If you choose not to create a custom footer for a template, it will inherit the one configured in your Email Settings. While not shown in the editor, this "default" footer content is automatically added upon message send.
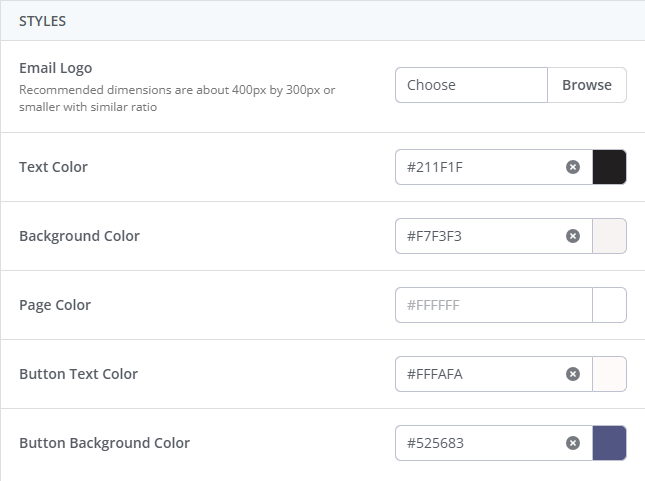
Styles
NOTE: For each template, you can customize its logo and various theme colors. If nothing is configured for a template, it will inherit the theme settings configured in your Email Settings. While not shown in the editor, these "default" theme settings are automatically set upon message send.
- Email Logo: Click the button to upload an image to serve as the template's unique logo. Recommended dimensions are 400px by 300px or smaller with similar ratio.
- Text Color: Set a custom text color for the template.
- Background Color: Set a custom message background color for the template.
- Page Color: Set the outer page/background color for the template.
- Button Text Color / Button Background Color: Set custom button colors for the template. These colors are used if you include link buttons in your Body, CTAs, or Footer.
When you're finished configuring the template, click Save at the top right of the page to add it to the Email Templates page.
Personalization Tokens
Insert personalization tokens into your templates to dynamically insert details about your community, subcommunity, recipient, and more.
For example, inserting the greeting “Hey, {targetUser.name}!” will dynamically update to the recipient's name upon send: "Hey, John!" or "Hey, Elizabeth!"
Available tokens
Token | Refers to | When to Use |
|---|
{targetUser.name} / {targetUser.email}
| The recipient of the email. | Use when you want to address the person receiving the email (“Hi {targetUser.name}”). |
{user.name} / {user.email}
| The user who triggered the automation rule. | Use when the email is being sent to someone else (e.g., a moderator or group owner) and you want to include details about the triggering user. If the impacted user is also the recipient, {user} and {targetUser} will be the same. |
{site.title}
| The name of your Vanilla community. | Use to identify the community the email is coming from. |
{discussion.name}
| The title of the related post. | Use with post-related triggers such as Post receives reports, Post added to a collection, Post receives a minimum of points, Sentiment of post, Votes on an idea, etc. |
{discussion.body}
| The body content of the related post. | Use when you want to include the full content of the post in the email (e.g., escalations, digests, or notifications). |
{comment.name}
| The name of the related comment. | Use with comment-related triggers such as Post receives reports, Post receives a minimum of points, Sentiment of post. |
{comment.body}
| The body content of the related comment. | Use when you want to include the full text of the comment in the email (same triggers as above). |
{AccountInfo}
| Login details (email/password) included in “Account Added” registration emails. | Only available for Account Added emails to provide credentials to the new user. |
NOTE: Let's provide more context about the usage of [targetUser.name} and {user.name}.
{targetUser.name} / {targetUser.email}: The person receiving the email. Use when you want to address the recipient directly (e.g., “Hi {targetUser.name}”).
{user.name} / {user.email}: The user who triggered the Automation Rule. Useful when the email is being sent to someone else (like a moderator) and you want to include details about the triggering user.
Important: If the email is sent to the impacted user (e.g., “Send email to impacted user” action), then {user.name} and {targetUser.name} will be the same person.
Examples:
Impacted user = recipient: Jane registers and an Automation Rule sends her a welcome email. In this case {user.name} and {targetUser.name} both return Jane.
Impacted user ≠ recipient: Jane registers and a rule sends Adam a notification. In this case, {user.name} = Jane (the trigger) and {targetUser.name} = Adam (the recipient).
Language translation
If you have multiple languages enabled in your community, you can provide translations for message content for each available language. Then, if users have configured a preferred language in their Notification Settings, they will automatically receive emails in that language.
This feature is ideal for organizations who have a diverse group of language speakers. For example, your primary community may comprise English speakers but you also have one or more subcommunity's dedicated to users who speak a different language (e.g., French).
Translation behavior for default templates
Built-in templates are not associated to Automation Rules like your custom templates, meaning they are sent automatically based on set actions, like users registering for an account or having their membership approved. Even so, be sure to take the time to provide translations for these built-in templates to ensure the correct "version" is sent based on the delivery schedule below.
- Welcome: Sent in the language of the subcommunity where the user registered.
- Invitation & Account Added: Sent in the language of the location or action that triggered the email (e.g., if an invite is sent from a French subcommunity, the invite email will be French, if you've configured a French translation).
- SSO Connect: Sent in the language the user is passed through at first SSO login/registration.
- Membership Approved: Delivery depends on whether the user has set a preferred language between the time of registration and approval, or on the the language of the subcommunity the moderator is in when they approve the request to join. Confirm this behavior in your environment.
NOTE: If a translation is not provided, the email is sent in your community’s default language.
Create translation "versions" for a template
NOTE: You cannot configure translation during template creation; it can only be done after creation when editing a template.
- Edit an existing built-in or custom template.
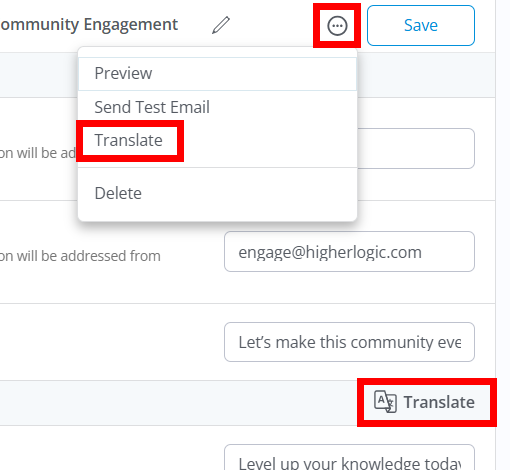
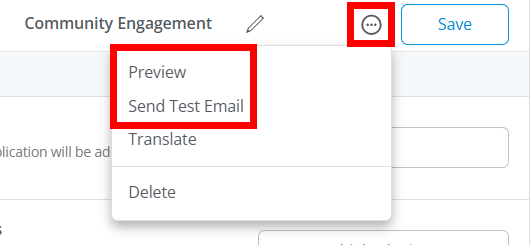
- Click the ellipsis (…) menu and select Translate or click the Translate button in the Message Content header.
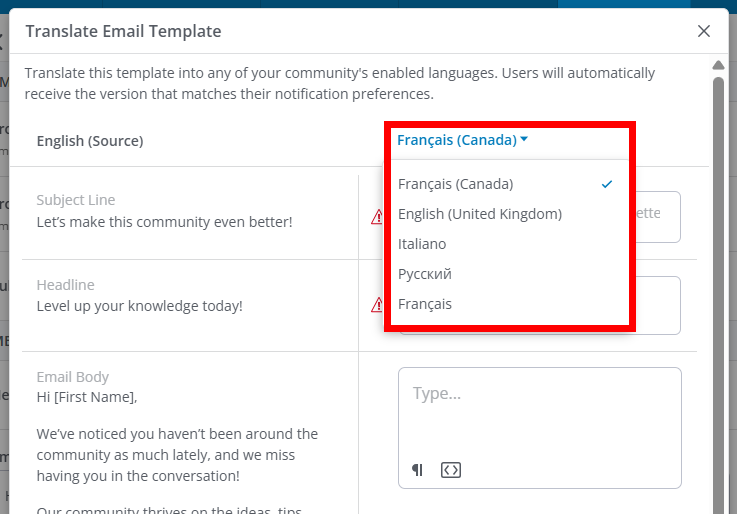
- The Translate Email Template dialog displays, showing the template's current text in your community's primary language on the left. From the dropdown on the right, select which language to create a translation for.
- Provide the translated text in the associated fields in the right column.
- Repeat this process for each language.
- Click Save at the bottom of the dialog to finalize your template translations.
Preview templates & send test emails
Once you've finalized a template, it's recommended to:
- use the Preview feature to quickly test your design, links, etc., and
- the Send Test Email feature to ensure proper rendering across email clients, and to view personalization tokens and translations.
NOTE: These options are only available while editing an existing template. If you're in the middle of creating a template, you need to save it and then edit it.
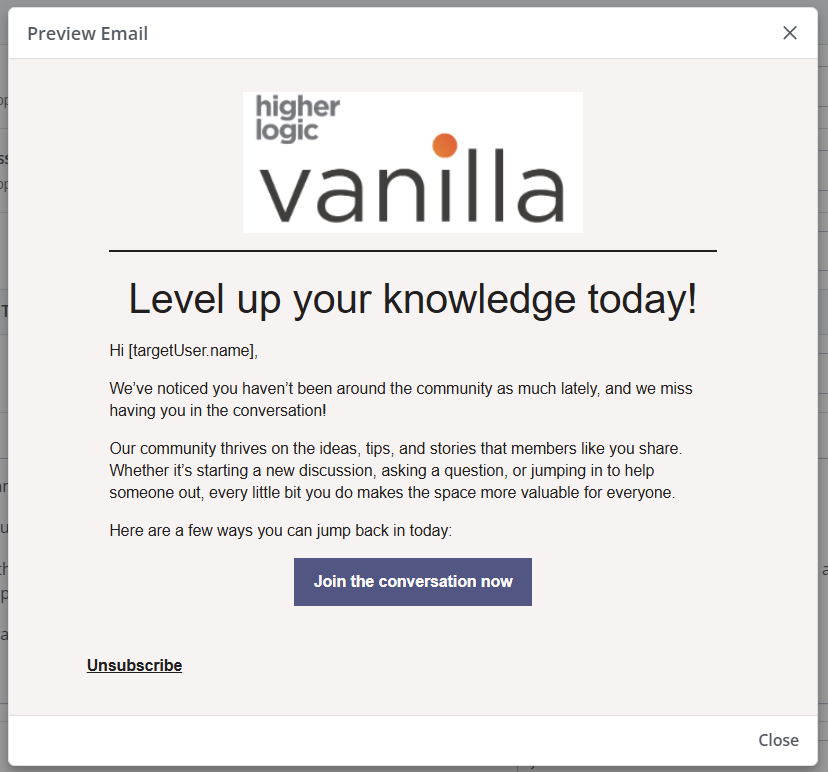
Preview a template
Select the Preview option to view your template in a popup, complete with imagery, theming, formatting, etc. This is a great way to quickly see how your template is coming together as you work or to view changes such as new logos, formatting, etc.
TIP: Be sure to save your work before previewing to ensure you're seeing the latest changes.
Send test email
Select Send Test Email to display the associated dialog, in which you can:
- Select the user to view the test email as in the Community Member Content field. For example, if John Doe is a French-speaking user in your French language subcommunity, you can test your French translation text by sending the test email to him.
- Enter the email address to send the test email to in the Recipient field. We recommend sending test emails to individuals across multiple email clients to see how they render in each one.

Manage your templates
- Click the pencil icon to edit a template. Refer to the Create an Email Template section, above, to learn about each option.
- Click the trashcan icon to delete a custom template.
NOTE: You can only delete custom templates; deletion is disabled for built-in templates and for any template currently tied to Automation Rules. If you want to delete a custom template associated to an Automation Rule, you need to first remove this association.

Associate Automation Rules to your custom templates
Templates are designed to work with new and existing Automation Rules, enabling email sends based on triggers like inactivity or specific member actions.
NOTE: The built-in system templates run automatically and cannot be associated to your Automation Rules; only custom templates can. For example, the Welcome Email template is automatically sent to new members of your community.
Any custom templates you've created can be associated to one or more Automation Rules on the Settings > Automation > Automation Rules page.
When creating or editing an Automation Rule, you can assign an email template to Rule's with the following options:
- The Send email to user Action that delivers your chosen template to users based on the Rule's Trigger.

- The Send an Email After This Rule Runs option that lets you pair one of your custom templates with any other Trigger and Action you’ve configured.
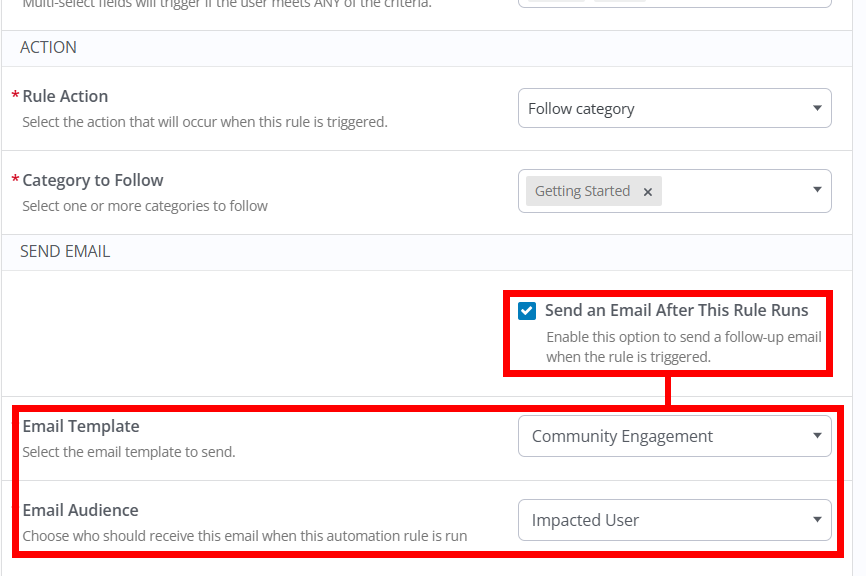
Choose the template + audience
With either option selected, the Email Template and Email audience options appear, allowing you to:
- Select the custom email template the Automation Rule will use. Only custom templates you've created on the Settings > Communications > Email Templates page can be selected.
- Define who should receive the email template:
- Specific Users: Allows you to select one or more users to receive the email.
- Specific Roles: Allows you to select one or more Roles; all users belonging to the Role(s) (e.g., Product Managers) you select will receive the email.
- Impacted User: This is a broader audience option, ideal for targeting all users who perform a specific action in your community, which is tied to the rule's Trigger. For example, if your rule Trigger is
New/Updated Profile Field, the email will be sent to ALL users who updated X field on their user profiles.
Automation examples
- Re-engage inactive members with a “We miss you” email after 90 days.
- Send an onboarding tip seven days after registration.
- Notify Product Managers when an idea reaches 20 votes.
- Alert a subject matter expert if a tagged question is unanswered for three days.
- Add an email to any existing rule that already changes status, updates profile fields, adds to collections, or performs another action. For example:
- When an idea reaches 50 votes, add it to my Popular Ideas Collection and email the author.
- When a user checks the “I’m interested in being a beta tester,” profile field, invite them to the Beta Testers group and email the group owners/leaders.
Email preferences and unsubscribing
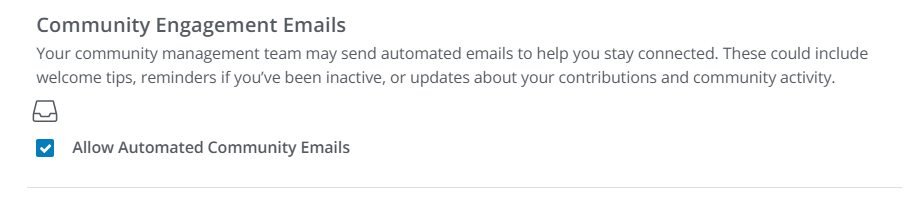
All automated emails include an unsubscribe option to ensure compliance with email regulations.
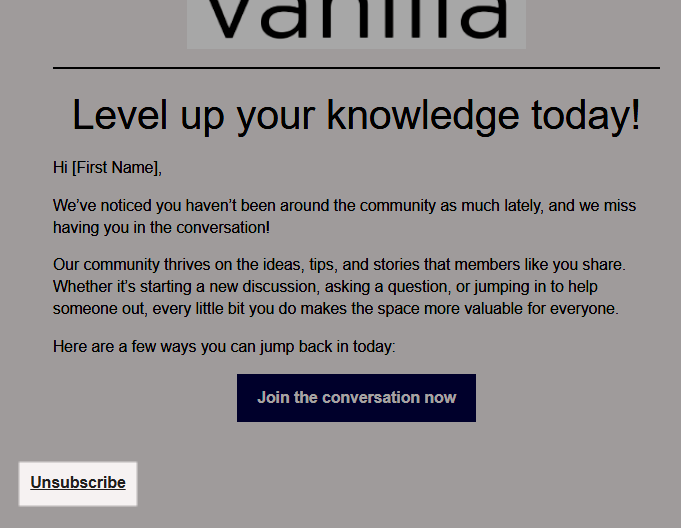
You can also manage this setting directly in your profile, under Notification Preferences > Community Engagement Emails.
- This preference controls ALL automated emails created with email templates and Automation Rules. If you unsubscribe, you'll no longer receive any automated emails from your community management team.