In this article, you'll learn how to configure the appearance of your outgoing emails, including:
- enabling plain text or HTML emails,
- uploading a logo (HTML only),
- configuring various email colors (HTML only),
- and setting up your email footer.
In addition, we'll walk through how to preview your email and send a test email, perfect for verifying your design in various email providers.
Access the Email Settings page
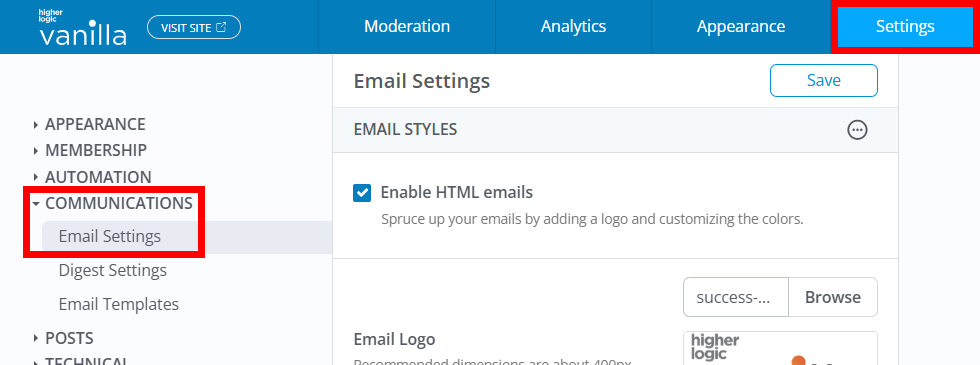
All of these actions are available on the Email Settings page. To access it:
- Access the Dashboard.
- Navigate to Settings > Communications > Email Settings.

Enable HTML emails
At the top of the page, check the Enable HTML emails box. This displays several options you can use to configure the design of your HTML emails, discussed below.
NOTE: When HTML emails are disabled, only plain text emails are sent. Keep in mind, though, that even when HTML emails are enabled, a plain text version is also sent. HTML emails can include colors, images, and other styling while plain text emails are just plain text.

Configure HTML email design
With HTML emails enabled, you can customize their appearance using the options below.
TIP: Have your brand's RGB color codes available. This will make this process faster and easier AND will ensure that your design matches your branding.
- Logo: This image will appear at the top of the notification emails. The max size of your email logo is 400px by 300px. Images larger than this will be scaled down to fit these dimensions.
- Text Color: The default text color of headings and body.
- Background Color: The background color of the email.
- Page Color: The color of the foreground container of the email.
- Button Text Color: The text color of the button. Note that depending on its content, an email may not contain a button.
- Button Background Color: The background color of the button. Note that depending on its content, an email may not contain a button.

Configure email footer
In the OUTGOING EMAILS section of the page, you can use the Email Footer field to configure a footer for your plain text and HTML emails. With plain text emails, of course, any HTML and images you add will be stripped out.
TIP: This field accepts most types of content, so the simplest way to create a footer is to copy and paste content from another source, such as your organization's corporate web site or existing email. Note that, at this time, footer content will be left-aligned.

Preview & send a test email
At the top of the page, the Preview and Send a Test Email options are available in the ellipsis (…) menu.
- Select Preview to display a popup showing the current design of your email, including colors, button, and footer content. You can preview unsaved changes.
- Select Send a Test Email to display a dialog where you can enter one or more email addresses to receive the test email.
- Enter multiple addresses in a comma-separated format.
- Sending test emails to various email providers is a great way to validate your design with each one, as each email provider may render certain elements differently.

Related articles