You can connect your Higher Logic Vanilla (Vanilla) community to your ServiceNow account via our ServiceNow integration. When connected, staff users can escalate Vanilla posts to ServiceNow as tickets; ticket details then display in the Vanilla post via an external asset card.
NOTE: You can escalate the following post types: discussions, questions, ideas, and comments.

Setting up this integration is simple, with only a few steps required in your Vanilla community.
NOTE: It is assumed your ServiceNow account is already set up: this article focuses on the steps required to connect your Vanilla community to your ServiceNow account, not on how to set up and manage your ServiceNow account.
Enable the ServiceNow addon
IMPORTANT: Only Vanilla staff can enable the ServiceNow addon for your community. Contact Vanilla Support to begin the process.
Once enabled, you'll then want to configure the integration's settings to connect your Vanilla community to your ServiceNow account. Refer to the section below to learn more.
Configure ServiceNow settings
1. In Vanilla, access the Dashboard.
2. Navigate to Settings > Connections > ServiceNow.
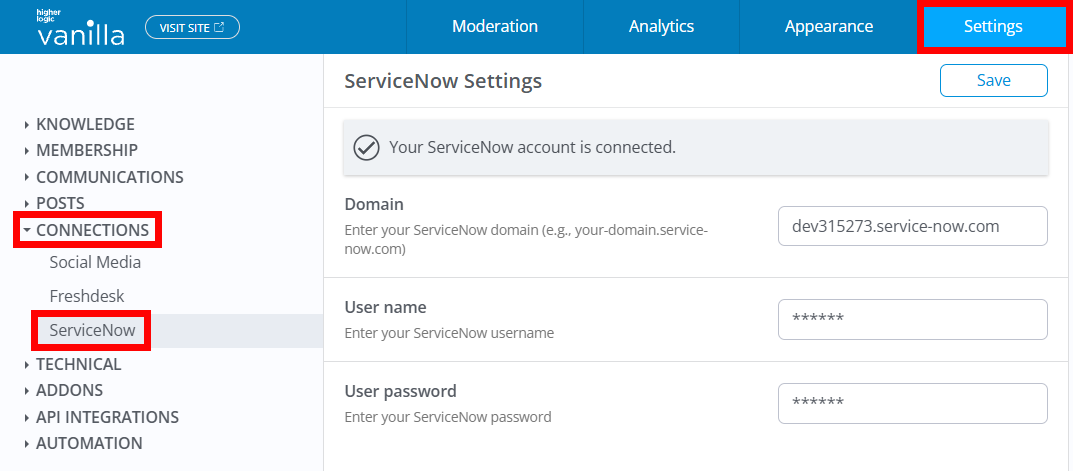
3. Complete the fields:
- Domain: Enter your ServiceNow domain only (e.g.,
company.ServiceNow.com). Note that https:// is not necessary: if you add it, Vanilla will strip it out. - User name / Password: Enter your ServiceNow credentials to connect to your ServiceNow account.
4. Click Save, and then to finalize the update, refresh the page to have Vanilla validate the connection.
5. An error will display if one or more of your fields is invalid; the configuration will not be saved until valid, so resolve any issues to complete the configuration.
IMPORTANT: If your ServiceNow credentials ever change, be sure to also update them in Vanilla to keep the connection functional.
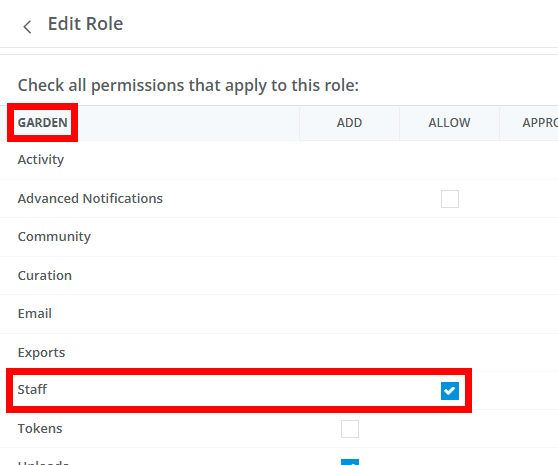
Required permission
Users must belong to a Role with the Garden > Staff > Allow permission in order to:
- create a ServiceNow ticket from a Vanilla post and
- view the resulting external ticket in the Vanilla post.
NOTE: Separate from user permissions, admins can also use an Automation Rule action, Escalate to ServiceNow, to create tickets automatically based on triggers; this doesn’t rely on the above-mentioned Role-based permission. This process is explained in the Automate ServiceNow escalations with Automation Rules section of this article.
Manually escalate a post to ServiceNow
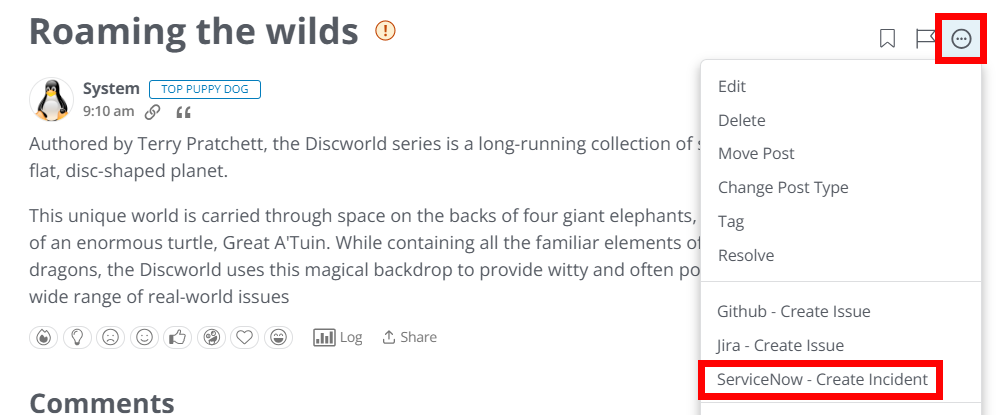
Once the integration is connected, the ServiceNow - Create Incident option appears in a post's actions menu.
1. In Vanilla, navigate to a post.
2. Click the ellipsis (…) menu and select ServiceNow – Create Incident.
3. In the resulting dialog, the fields are prepopulated with the post's details and author information. Confirm or edit this information, as needed:
- Contact Name: Defaults to the post author’s username and is editable in case you want the requester’s display name to differ from the post author.
- Contact Email: Defaults to the post author’s email and is editable, allowing you to designate the appropriate requester email for the ticket. ServiceNow requires a requester (commonly an email) when creating a ticket, so this field is required.
- Subject Title: Prepopulated with the post title and editable as a single‑line text field so you can tailor the ticket’s subject for ServiceNow.
- Body: Prepopulated with the post’s body text, which is editable in a rich text area that allows basic formatting for clarity and added details. The ServiceNow API supports HTML in this description, so formatting you apply will be preserved in the ticket body.
NOTE: ServiceNow does not preserve any formatting or images from Vanilla posts that are sent over.
4. Click Create Incident to create the ticket via API; Vanilla stores the ticket reference.

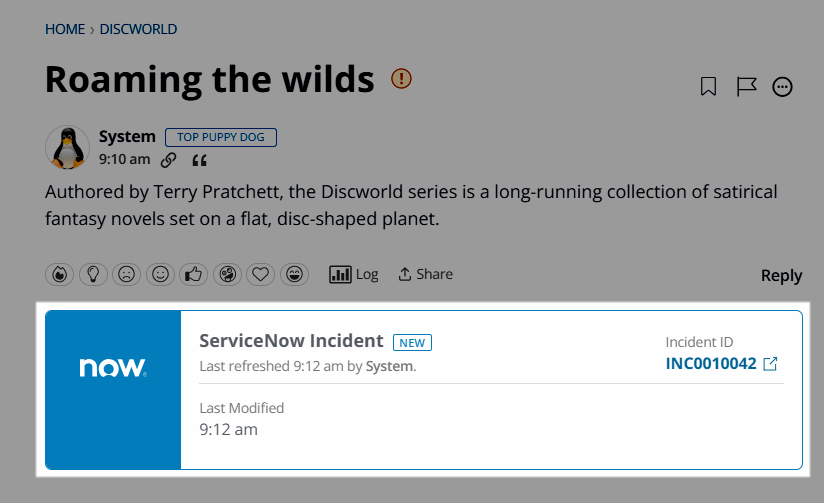
Once created, Vanilla makes a POST to ServiceNow’s Incident Table API, stores the resulting incident number and metadata, and attaches an external asset card to the post showing the ServiceNow logo, current state (e.g., NEW), link, user who escalated, created time, and last updated.
TIP: As tickets are worked in ServiceNow, their current State will automatically update in Vanilla so users understand where tickets are in their lifecycle.
Automate ServiceNow escalations with Automation Rules
Once ServiceNow is enabled and configured, you can automate ServiceNow ticket creation (e.g., based on sentiment or reports) via Automation Rules. (Refer to this article for help on creating and enabling Automation Rules.)
NOTE: The Role-based permission outlined in Required permission is not required to escalate via Automation Rules.
- Access the Dashboard and navigate to Settings > Automation > Automation Rules.
- Create a new Automation Rule.
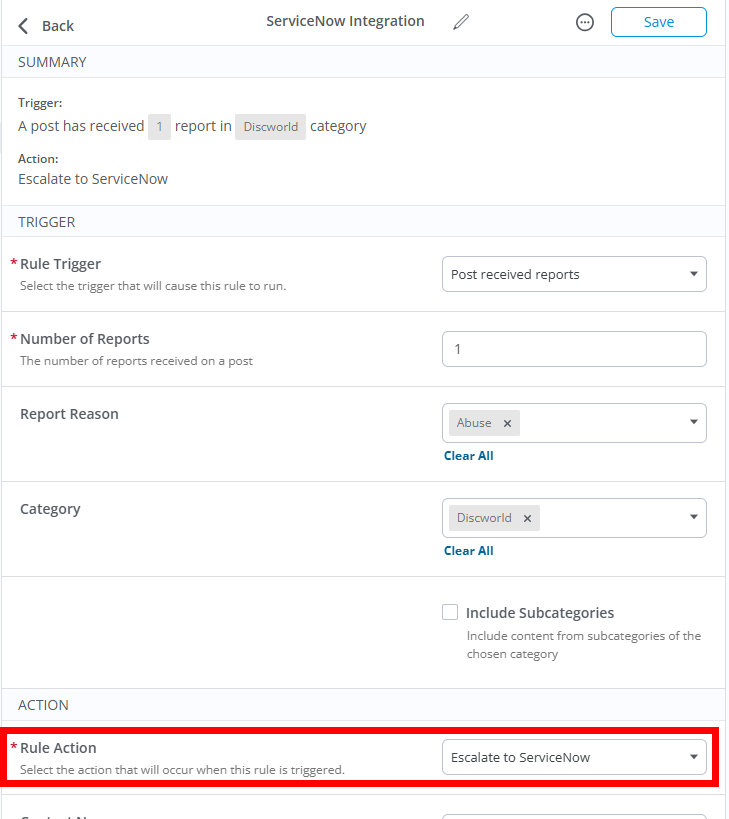
- Set your Trigger (e.g., “Post received 1 report” or sentiment‑based conditions).
- For the Action, choose Escalate to ServiceNow.
- Configure the associated ServiceNow settings, as well as any other options needed.
- Save and enable the rule. Escalations through this action incur analytics for tracking (more on this below).
ServiceNow analytic tracking
Let's cover what Vanilla tracks in our Analytics when a ServiceNow ticket is created from a community post or Automation Rule.
What events are logged
This data is recorded in the Post Escalations data source, specifically as an Escalation Routed event.
- For ServiceNow, the event is tracked as Event Type:
Escalation Routed with a destination field like routedTo = ServiceNow so you can filter/count ServiceNow escalations distinctly. - When the escalation is first created (before routing), an Escalation Created event is also logged; subsequent actions (assign, status changes, comments, hide/restore) are tracked as their own events, letting you see the full lifecycle of escalations in analytics.
- All automated escalations via Automation Rules (with Action Escalate to ServiceNow) are also tracked.
What data is included with the event
Each Post Escalations event captures the data below so you can build detailed charts and filters. Key metrics include:
- Event Type (Escalation Routed).
- Routed To (destination system; filter this to ServiceNow to isolate these tickets).
- Event Source (User Escalated vs Automation Rule), plus Automation Rule ID/Name if applicable.
- Escalation metadata:
- Escalation ID
- Date Escalated
- Previous Escalation Status (for status changes).
- Users involved:
- Escalating User
- Record Author
- Assigned User
- Content context:
- Record Type (discussion/comment)
- Record ID/URL
- Category
- Report Reason IDs/names
- Count Reports